Yesterday was Vinayaka Chaturthi . Hope you all enjoyed the festival. Well I enjoyed mine. This is the first time we ever celebrated this festival in the USA. This being Ankushs first Ganesha Chaturthi , I made sure that we start to celebrate it in our own little way with how much ever possible. The first thing that comes to the mind when having to celebrate this festival is to get a Ganesha idol. Thanks for not finding one around where we live in US and thanks to me being a "Go Green" girl, I was all set to make my very own eco-friendly Ganesha Idol. Quickly searched to see if I could find some Idol making online and found this video. The material I used to make this is nothing but the coloured clay(for instance , Playdoh) available in the market. Im really not sure if its clay but it feels something like clay. But I didnt use playdoh, I used a different brand. But I recommend anyone attempting to do this to stick to playdoh if you are in US.
Here's the set I bought. I had a total of 6 colors. Please cut your fingernails before attempting this, coz it leaves a lot of nail marks if you don't do so. You will also need ear buds , paper towel/soft cloth to wipe your hands in between switching colors and markers/sketchpen.
Since I wanted to represented my Ganesha as an eco friendly one, I decided to use light green for the body. Make a large ball like this. This represents the body.
Next comes the legs. Take a choice of your colour and make 2 cylindrical, preferably narrower on one end and wider on the opposite.
Now place the broader ends on 2 opposite sides of the body and press lightly behind like your merging the green and the violet clay. see that it is fixed firmly. Next using your thumb and index finger lightly press on the narrower side of the violet piece to represent the feet of Ganesha.
Henceforth the pictures aren't in detail. This is coz I did this in the middle of the night and I started to loose my patience to take many pictures. But the video link I posted in the beginning says it all.
Once the legs are placed, next go for the arms. Take 2 cylindrical pieces, much shorter than the ones we used for the legs. Just press on the top to the body and let the other end rest on the leg. Lightly press along the length of the arm to the body so that it attaches well. Next use different colors to make the neck chain and the orange part in this pic(This part of the idol represents the sacred thread worn by many hindus).
Next comes the very important part, The head. I would say that this is just a matter of patience and dedication to get this shape. An easier approach
to get this shape is to make a trapezoid first. Then work on the broader end by lightly pressing it to flatten it a bit. Then work on the narrower end to thin it down and shape it like a trunk. Work on the whole piece and finally you will get this shape.
Before attaching the head portion to the body , take a small piece of clay, about the size of your smallest toe:) Put it in the place where you would keep the head and press it lightly and now attach the head. The small piece of clay acts as a support to the head and it also gives the required height and the angle for the head. Gosh! Hope you've understood.
In this pic, I have also done the palms. Take a pea sized piece of clay, make it into a nearly egg shape and just press it between your thumb and index finger to get the shape of a palm, place them as shown in this picture. One palm should look like it is blessing us and the other one to hold the modak.
Next comes the ears.Take a small amount of clay, work on it to get an egg shape, flatten it to look like an oval disc, then lightly try to curve on the lengthier side inwards to get the ear shape. I'm sure its really easy.Now attach it to both ends of the head by slightly overlapping the clay from the head and the ears from the back side.
Take a ear bud and lightly press on the head in the place where you intend to keep the tusks. This will create a small indent to hold the tusks. make 2 conical shaped tusks and just lightly press inside.
Next comes the crown. This design is left to an individual choice. I made a conical shape and with the help of the narrower end of spoon, I carved out a little to get this design.
To complete the Idol, use red clay to keep the Tilaka as shown. Again using ear bud I slightly pressed on the head in place of the eyes. Using a black marker/sketchpen, I drew the eyes. Please use a very thin tip marker. I used a broader tip marker and it started to spread out. I had to then fix it. Keep this in mind. You can use ear bud to smoothen the texture of the idol by simply lightly rubbing over it.You can make your own decorations now. You can use beads, zardosis etc to decorate it. I just wanted to keep it all plain clay.
This is how I made our Ganesha Idol!
Done!!
Now for the Gowri Idol. I did not find any tutorial for this. But I saw this picture in the net and used this as a reference to make the Gowri idol.
Just Look at my sweethearts in the background;)))) Ummmaaaaa..Love them:)
This is how we celebrated the festival. This is a pic taken after the pooja. OH! I had my mom recite the mantras and guide me through the pooja procedure online through skype:)
I made the flowers in this picture using the left over clay.
Oh and how can the food be missed:) The menu includes idli, coconut chutney, chickpea sundal, Lemon rice, rasam, vegetable kootu, pumpkin bajji, kadubu, carrot kosambri, white rice of course. We invited our friends over for the celebrations. Heres a very cute pic of my son Ankush playing with his cutest friend Oishi:)) Oishi is one and half yrs old and she keeps calling Ankush as "bhaiiiiii" in her own sweet way:) How cute is that!!!!
Wow, we had an awesome day yesterday:)) Hope you enjoyed yours. Oh ,yesterday was a special day coz it also happens to be Eid. How more special can a day be when all friends get together and celebrate!!!!
Traveling through the alleys and crossroads in my mind, I'm trying to learn my soul, find answers. While I stand here , I am unleashed of all the tensions inside and outside me. Life is just the way it is...Happy, Beautiful yet mysterious. This is Me: My Space , My cup of Soul!
Sunday, September 12, 2010
Friday, August 27, 2010
DIY Look Alike Wind Chime
Weekends..weekends..weekends...!!! They are so short:( Y is that? I wish there would be 2 more days in weekend. Whatever! Weather in florida is so unpredictable. It looks like its gonna be so damn hot down the day and all of a sudden ,BOOM and it starts raining cats and dogs. Just hoping it wont rain in the coming long weekend. By the way, my son Ankush has got his first tooth. He smiles and I can see a white pearl clinging up there.
This is a tutorial for Look alike wind chime which I completed yesterday.Of course its a look alike coz it doesnt really chime! I used hollow tubes from kitchen towels, shower curtain rings, artificial stones, beads, ribbons and of course all the necessary stationary.
You need to cut the kitchen towel tubes into pieces like this. Simply cut the tube lengthwise and you get this.One was enough to get six such pieces.
Next, you need to stick colored paper on both sides of these. I used black and white alternating on 3 of them, i.e back and front both.
Next , you neeed to cover the shower curtain rings with any ribbon of your choice. I used all in all 8 rings .
After sticking the colored paper, use beads/stones/ embellishments on them for decoration. I used these stones.
Join the cut paper tube and shower curtain rings with beads as shown. I used a thread to join them. I tried joining them with strings but it was hard to do so. Hence stuck with the good ol' thread. Join 3 such pieces equidistantly to a ring.
To hang it, you need to take 3 equal length of thread strands, join it equidistantly to the ring and place a knot by tying all 3 strands together half distant away, and the other end can be used to hang it as seen in this pic.
I made 2 of these . If you can get something that looks like a really big ring, double the size of the shower curtain ring I used, all 6 could be put into one, which would look awesome. So here's how I made this hanging.
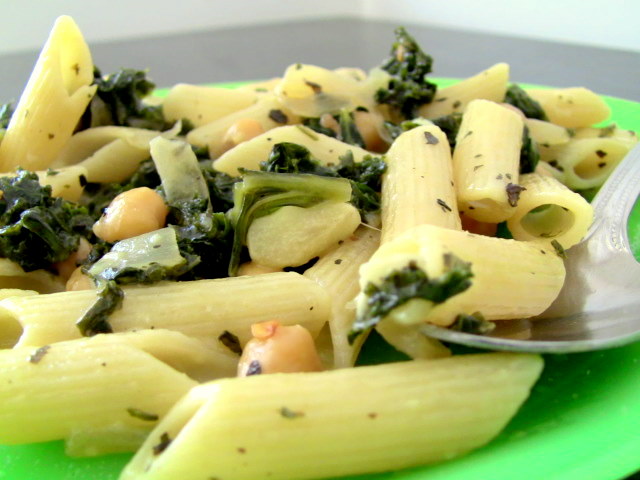
This is what I had for lunch today. Penne pasta with kale and chickpea:) slurrrrrpppppp!!!
This is a tutorial for Look alike wind chime which I completed yesterday.Of course its a look alike coz it doesnt really chime! I used hollow tubes from kitchen towels, shower curtain rings, artificial stones, beads, ribbons and of course all the necessary stationary.
You need to cut the kitchen towel tubes into pieces like this. Simply cut the tube lengthwise and you get this.One was enough to get six such pieces.
Next, you need to stick colored paper on both sides of these. I used black and white alternating on 3 of them, i.e back and front both.
Next , you neeed to cover the shower curtain rings with any ribbon of your choice. I used all in all 8 rings .
After sticking the colored paper, use beads/stones/ embellishments on them for decoration. I used these stones.
Join the cut paper tube and shower curtain rings with beads as shown. I used a thread to join them. I tried joining them with strings but it was hard to do so. Hence stuck with the good ol' thread. Join 3 such pieces equidistantly to a ring.
To hang it, you need to take 3 equal length of thread strands, join it equidistantly to the ring and place a knot by tying all 3 strands together half distant away, and the other end can be used to hang it as seen in this pic.
I made 2 of these . If you can get something that looks like a really big ring, double the size of the shower curtain ring I used, all 6 could be put into one, which would look awesome. So here's how I made this hanging.
This is what I had for lunch today. Penne pasta with kale and chickpea:) slurrrrrpppppp!!!
Monday, August 16, 2010
DIY Home Decor [1] , a bread and a cake
It's the 15th of August today and a very Happy Independence Day to All.I do feel very proud to be an Indian. Also, Im sure most of us are still whining and complaining about all the socio and economic issues in India. But Hello!!!! Its our country ,We need to change and help others to change, right? We really need to come out of all our old ways and practices , think practically and move ahead. Ahem..Ahem...Guess I need to write a different post on this topic;)Lemme stop here about this,NOW.
I love decorating my house, especially glaming up the boring and the pale white walls in my apartment. Ufffff...Ooooooooooooooh .Ankush (my son) has removed the space bar button and we are finding it so difficult to type:(( ;) Coming back, So I have a number of small budget, reusable products home decor projects in my mind. So thinking of posting a series of DIY's. But I'm gonna be real slow and here are the first ones.
I found this set of Construction Paper at Michaels. Its an amazingly cheap product but a very interesting and handy product. Just use your creativity and you can get a million ideas. But my only problem is with the colours. I don't really like the available colours. I would have loved more softer colours, but considering its mostly used by kids for their school craft projects, its a Thumbs Up! Hope I can find an alternative paper just for the colour sake.
Ok, So I am not gonna give a step by step tutorial here, but the picture says it all. This one ,I stuck on the wall across the front door. All you need is the construction paper, a thin cardboard or any paper to stick them on, scissors, glue , sketchpens/markers ,double sided gum tape and your imagination. I cut thin strips of blue and white and pasted it randomly to give the background. And I used pieces of ribbon here and there randomly. Since I wanted to stick this across the front door, I used the WELCOME theme. Just cut brown and green squares for the letters and stick them over the stripes. You can cut any designs you like or paste other embellishments and stick it over this. And its done!!!
This one here ..NOT a good pic:( But in real ,it does look good:) So you need construction paper,double sided gum tape ,scissors , a thin cardboard (I used my cereal boxes) and of course your Imagination! Cut circles of 3 different sizes and colours from paper and thin cardboard. paste the paper over the cardboard.Cut thin circle strips of white and paste it over any circle as desired.Now arrange them as per your likes and paste it over wall. What I exactly had in my mind was to make a 3 or 4 ft long of this continuous design with light blue, dark blue and few tiny circles of black and white in between them arranged randomly. But so bad , cudnt find the appropriate colours:( So ended up doing it like this! Anyways,It still looks gr8:) Only If I had more time I would have cut circles on white sheets and painted them to my hearts content.
This is the apple and banana bread I baked the other evening which came out well .Its a super fast recipe which got prepared, went into the oven and baked out in an hour. Yummylicious!! but hubby dear did not like it:((He wanted a spicy bread,not a sweeter one. "Next time Honey!"
This is my first ever fondant cake I prepared for my Bday, which didn't really turnout as I wanted it to. First of all, I didnt have much time with my son around. Secondly, Phew.......fondant is toooooooooooooo hard to work with for first timers. Thirdly, You need to make all your fondant decorations a day or 2 earlier to let it harden up. And blahblah blah...really lots of things I didn't knew before trying it. I know,I know , too many excuses!!! But the best part of it is that, I gottu learn all these and of course it tasted awesome:) That's what hubby dear said;) He loved the cake and he's here pinching my arm as I write this:) hmmmmmm..Learn from your mistakes.
Waiting to make my next fondant cake on my hubby's bday.
I love decorating my house, especially glaming up the boring and the pale white walls in my apartment. Ufffff...Ooooooooooooooh .Ankush (my son) has removed the space bar button and we are finding it so difficult to type:(( ;) Coming back, So I have a number of small budget, reusable products home decor projects in my mind. So thinking of posting a series of DIY's. But I'm gonna be real slow and here are the first ones.
I found this set of Construction Paper at Michaels. Its an amazingly cheap product but a very interesting and handy product. Just use your creativity and you can get a million ideas. But my only problem is with the colours. I don't really like the available colours. I would have loved more softer colours, but considering its mostly used by kids for their school craft projects, its a Thumbs Up! Hope I can find an alternative paper just for the colour sake.
Ok, So I am not gonna give a step by step tutorial here, but the picture says it all. This one ,I stuck on the wall across the front door. All you need is the construction paper, a thin cardboard or any paper to stick them on, scissors, glue , sketchpens/markers ,double sided gum tape and your imagination. I cut thin strips of blue and white and pasted it randomly to give the background. And I used pieces of ribbon here and there randomly. Since I wanted to stick this across the front door, I used the WELCOME theme. Just cut brown and green squares for the letters and stick them over the stripes. You can cut any designs you like or paste other embellishments and stick it over this. And its done!!!
This one here ..NOT a good pic:( But in real ,it does look good:) So you need construction paper,double sided gum tape ,scissors , a thin cardboard (I used my cereal boxes) and of course your Imagination! Cut circles of 3 different sizes and colours from paper and thin cardboard. paste the paper over the cardboard.Cut thin circle strips of white and paste it over any circle as desired.Now arrange them as per your likes and paste it over wall. What I exactly had in my mind was to make a 3 or 4 ft long of this continuous design with light blue, dark blue and few tiny circles of black and white in between them arranged randomly. But so bad , cudnt find the appropriate colours:( So ended up doing it like this! Anyways,It still looks gr8:) Only If I had more time I would have cut circles on white sheets and painted them to my hearts content.
This is the apple and banana bread I baked the other evening which came out well .Its a super fast recipe which got prepared, went into the oven and baked out in an hour. Yummylicious!! but hubby dear did not like it:((He wanted a spicy bread,not a sweeter one. "Next time Honey!"
This is my first ever fondant cake I prepared for my Bday, which didn't really turnout as I wanted it to. First of all, I didnt have much time with my son around. Secondly, Phew.......fondant is toooooooooooooo hard to work with for first timers. Thirdly, You need to make all your fondant decorations a day or 2 earlier to let it harden up. And blahblah blah...really lots of things I didn't knew before trying it. I know,I know , too many excuses!!! But the best part of it is that, I gottu learn all these and of course it tasted awesome:) That's what hubby dear said;) He loved the cake and he's here pinching my arm as I write this:) hmmmmmm..Learn from your mistakes.
Waiting to make my next fondant cake on my hubby's bday.
Subscribe to:
Posts (Atom)